This pane shows the presentation for a Process. Select the ![]() button on a row on the To Do List or Process List pane to display the Process panel for that process.
button on a row on the To Do List or Process List pane to display the Process panel for that process.
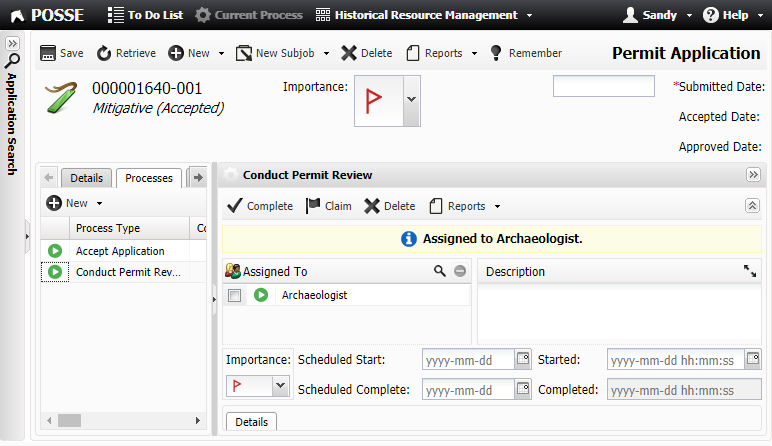
The Process panel appears on a job page when a process is selected.
The Process panel can be slid in or out to hide or display it, just like the Search panel.
Buttons along the top of the panel allow users to:
•Select an outcome to complete the process in a pop-up window.
•Assign the process to themselves.
•Delete the process
•Open or download a report.
The following table describes the different features and functions that are available:
Feature |
Function |
|---|---|
Complete |
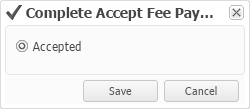
Select Complete to open a pop-up window showing the outcomes available to complete the process.
•Select the desired outcome option then select Save to complete the process with that outcome and save all changes to the job and process.
•Select Cancel to return to the Process panel without choosing an outcome. The process pane becomes read-only when the process is completed.
|
Claim |
Select
Any current assignees are removed. The change is saved automatically, but other changes are not saved with it.
|
Delete |
Select Delete to remove the process from the job.
|
Reports |
Select the Reports button then select the desired report from the drop-down list to open or save it.
Reports with a
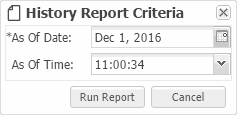
If the History Report appears in the list, just above the Audit Report, selecting it opens a criteria pop-up window that provides a As Of Date calendar entry and As Of Time drop-down.
Set the desired criteria and select the Run Report button.
The report opens as a .pdf file in a new browser window. If the Audit Report item appears in the list (as the last item), it produces a forensic audit report (without using a criteria pop-up window) when selected.
|
Workflow Error |
Selecting this opens the Workflow Completion dialog. This dialog shows any queued Workflow errors (report generation failed, script execution failed to execute, etc.), and gives the user an opportunity to retry or permanently ignore each one.
See the Processes List Pane help topic for more information on accessing the Processes Workflow Queue to correct workflow errors on a job in StaffUI.
NOTE: This button only appears if the user has navigated to a process with one or more outstanding Workflow errors on it. This can be achieved in multiple ways, such as: •By selecting •By selecting •By selecting Process Search from the All Searches Tab of the Quick Search Panel and filtering the results to include Workflow Errors Only. Then navigate to a Process by selecting
|
Assigned To |
Depending on what has been configured, this appears and behaves like a Single Select or Multi Select widget.
•Select the •Select the
•Select one or more assignees when Assigned To appears as a Multi Select widget, and select the •Select
|
Description |
Enter or modify information about the process here. Select the
|
Importance |
Select a level of importance to set for completing the current process. The levels of importance that can be selected are: • •
|
Scheduled Start |
Using the suggested format, enter a date that the process i scheduled to start or select a date from the Calendar pop-up to indicate the scheduled start date.
|
Started |
Enter a date using the suggested format or select a date from the Calendar pop-up to set the actual start date.
|
Scheduled Complete |
Enter a date using the suggested format or select a date from the Calendar pop-up to indicate the scheduled complete date.
|
Completed |
This read-only date is set by the software when the process is completed.
|
A number of tabs and sub-panes may be available on the Process panel. See the Widgets and Grid Edit Pane topics for help on interacting with the various buttons and widgets available.
Navigating away from the Process panel when there are unsaved changes causes a message to appear. It informs the user that navigating away will discard recent changes.
•To first save the changes, select ![]() then select
then select ![]() .
.
•Otherwise, select ![]() , which proceeds with the navigation and discards changes.
, which proceeds with the navigation and discards changes.